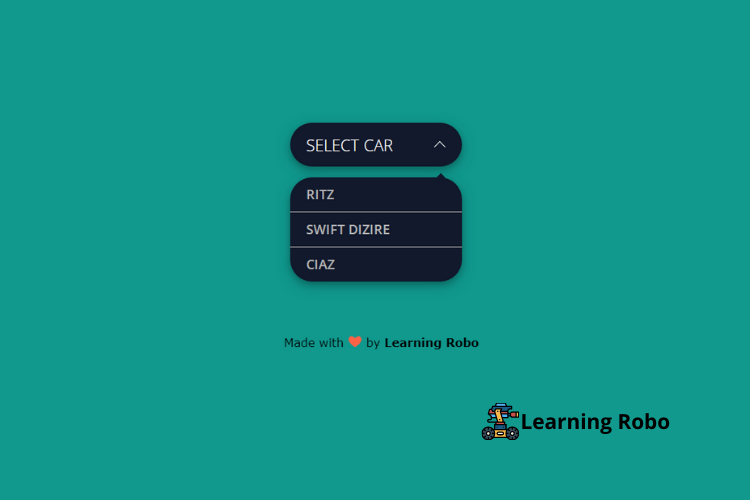
Hello developers, today in this blog you will learn how to create a Custom Select Dropdown Menu using HTML, CSS & JavaScript.
The select dropdown allows the user to choose one value from a predefined list. Custom Select Dropdown component is one of the most common requirements in web development. Clicking or hovering on a top-level menu label prompts a list of options to a dropdown.
In this blog (Custom Select Dropdown Menu), at first, on the webpage, there is a button, and when you click the button the dropdown menu container is shown. There is three menu list on the dropdown container.
The source code of this Custom Select Dropdown Menu is given below, and you can copy the source code of this program. You can use this code of the Custom Select Dropdown Menu with your creativity and can take this project to the next level.
Custom Select Dropdown Menu [Source Code]
To make this website (Custom Select Dropdown Menu), you need to create three files: an HTML file, a CSS file & a JavaScript file. First, create an HTML file with the name of index.html and remember, you have to create a file with a .html extension.
body {
  background: #11998e;
  font-family: 'Open Sans', sans-serif;
}
.center {
  position: absolute;
  display: inline-block;
  top: 50%; left: 50%;
  transform: translate(-50%, -50%);
}
.custom-select-wrapper {
  position: relative;
  display: inline-block;
  user-select: none;
}
  .custom-select-wrapper select {
    display: none;
  }
  .custom-select {
    position: relative;
    display: inline-block;
  }
    .custom-select-trigger {
      position: relative;
      display: block;
      width: 130px;
      padding: 0 84px 0 22px;
      font-size: 22px;
      font-weight: 300;
      color: #fff;
      line-height: 60px;
      background: #12192c;
      border-radius: 30px;
      cursor: pointer;
      box-shadow: 0 4px 8px 0 rgba(0, 0, 0, 0.2), 0 6px 20px 0 rgba(0, 0, 0, 0.19);
    }
      .custom-select-trigger:after {
        position: absolute;
        display: block;
        content: '';
        width: 10px; height: 10px;
        top: 50%; right: 25px;
        margin-top: -3px;
        border-bottom: 1px solid #fff;
        border-right: 1px solid #fff;
        transform: rotate(45deg) translateY(-50%);
        transition: all .4s ease-in-out;
        transform-origin: 50% 0;
      }
      .custom-select.opened .custom-select-trigger:after {
        margin-top: 3px;
        transform: rotate(-135deg) translateY(-50%);
      }
  .custom-options {
    position: absolute;
    display: block;
    top: 100%; left: 0; right: 0;
    min-width: 100%;
    margin: 15px 0;
    border-radius: 30px;
    box-sizing: border-box;
    box-shadow: 0 2px 1px rgba(0,0,0,.07);
    background: #12192C;
    transition: all .4s ease-in-out;
    box-shadow: 0 4px 8px 0 rgba(0, 0, 0, 0.2), 0 6px 20px 0 rgba(0, 0, 0, 0.19);
    opacity: 0;
    visibility: hidden;
    pointer-events: none;
    transform: translateY(-15px);
  }
  .custom-select.opened .custom-options {
    opacity: 1;
    visibility: visible;
    pointer-events: all;
    transform: translateY(0);
  }
    .custom-options:before {
      position: absolute;
      display: block;
      content: '';
      bottom: 100%; right: 25px;
      width: 7px; height: 7px;
      margin-bottom: -4px;
      border-top: 1px solid #12192C;
      border-left: 1px solid #12192C;
      background: #12192C;
      transform: rotate(45deg);
      transition: all .4s ease-in-out;
    }
    .option-hover:before {
      background: #f9f9f9;
    }
    .custom-option {
      position: relative;
      display: block;
      padding: 0 22px;
      border-bottom: 1px solid #b5b5b5;
      font-size: 18px;
      font-weight: 600;
      color: #b5b5b5;
      line-height: 47px;
      cursor: pointer;
      transition: all .4s ease-in-out;
    }
    .custom-option:first-of-type {
      border-radius: 4px 4px 0 0;
    }
    .custom-option:last-of-type {
      border-bottom: 0;
      border-radius: 0 0 4px 4px;
    }
    .custom-option:hover,
    .custom-option.selection {
      background: #f9f9f9;
    }

    .credit a{
      text-decoration: none;
      color: #000;
      font-weight: 800;
      }

      .credit {
        position: fixed;
        bottom:20px;
        left:40%;
          font-family: Verdana, Geneva, Tahoma, sans-serif;
        margin: 10px;
      }
$(".custom-select").each(function() {
var classes = $(this).attr("class"),
id = $(this).attr("id"),
name = $(this).attr("name");
var template = '';
template += '' + $(this).attr("placeholder") + '';
template += '';
$(this).wrap('');
$(this).hide();
$(this).after(template);
});
$(".custom-option:first-of-type").hover(function() {
$(this).parents(".custom-options").addClass("option-hover");
}, function() {
$(this).parents(".custom-options").removeClass("option-hover");
});
$(".custom-select-trigger").on("click", function() {
$('html').one('click',function() {
$(".custom-select").removeClass("opened");
});
$(this).parents(".custom-select").toggleClass("opened");
event.stopPropagation();
});
$(".custom-option").on("click", function() {
$(this).parents(".custom-select-wrapper").find("select").val($(this).data("value"));
$(this).parents(".custom-options").find(".custom-option").removeClass("selection");
$(this).addClass("selection");
$(this).parents(".custom-select").removeClass("opened");
$(this).parents(".custom-select").find(".custom-select-trigger").text($(this).text());
});
Thank you for reading our blog. If you face any problem creating this Custom Select Dropdown Menu using HTML, CSS & JavaScript, then contact us or comment us. We will try to provide a solution to your problem as soon as possible.


Post a Comment
Thank you
Learning robo team