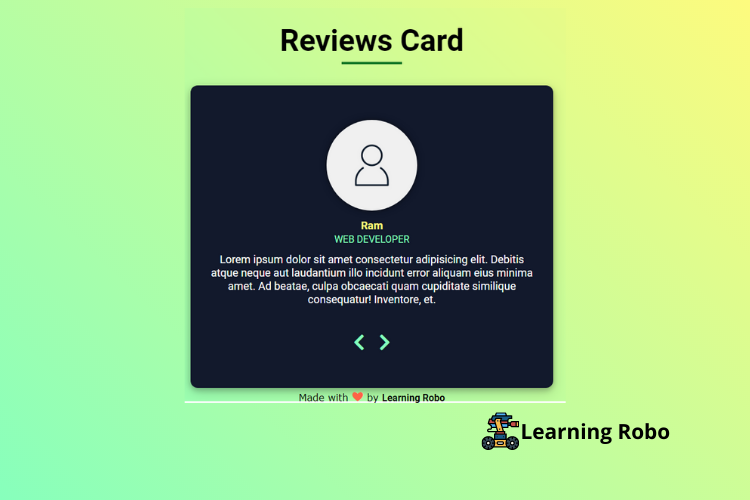
Hello developers, today in this blog, you'll learn to create a Review Card Slider using HTML, CSS & JavaScript.
A Review Card is a part of the website on which reviews can be posted about people, businesses, products, or services. Reviews have the power to influence customer decisions, can strengthen a company's credibility.
In this blog (Review Card Slider), on the webpage, there is a card at the center of the webpage which contains the reviews of the people about the businesses, products or services, etc., In this review card, there is a profile icon of the person, below the profile icon there is a name of the person with his/her destination and the review content of the person. Below these, two arrows are the forward arrow and backward arrow. By clicking the forward arrow, the review card will move to the previous card that was posted by a person. Similarly, for the backward arrow, the review card will move to the next card.
The source code of this Review Card Slider is given below, if you want the source code of this program, you can copy it. You can use this Review Card Slider with your creativity and can take this project to the next level.
Review Card Slider [Source Code]
To make this website (Review Card Slider), you need to create three files: an HTML file, a CSS file, and a JavaScript file. First, create an HTML file with the name of index.html and remember, you have to create a file with a .html extension.
@import url("https://fonts.googleapis.com/css?family=Open+Sans|Roboto:400,700&display=swap");

* {
  padding: 0;
  margin: 0;
  box-sizing: border-box;
  font-family: "Roboto", sans-serif;
}
img {
  max-width: 100%;
}

.main {
  width: 100%;
  height: 100vh;
  display: flex;
  justify-content: center;
  align-items: center;
  background-color: #85FFBD;
  background-image: linear-gradient(45deg, #85FFBD 0%, #FFFB7D 100%);
}

.container {
  width: 600px;
  display: flex;
  flex-direction: column;
  justify-content: center;
  align-items: center;
}

.title {
  margin: 40px 0px;
}

.title h2 {
  font-size: 50px;
  text-transform: capitalize;
  margin-bottom: 5px;
}

.title .underline {
  width: 100px;
  height: 4px;
  background-color: #177a29;
  margin: 0 auto;
}

.review {
  width: 100%;
  height: 500px;
  display: flex;
  flex-direction: column;
  justify-content: center;
  align-items: center;
  padding: 30px;
  background-color: #12192c;
  box-shadow: 0 4px 8px 0 rgba(0, 0, 0, 0.2), 0 6px 20px 0 rgba(0, 0, 0, 0.19);
  font-family: "Open Sans", sans-serif;
  border-radius: 12px;
}

#person-img {
  width: 150px;
  height: 150px;
  background-size: cover;
  border-radius: 50%;
  object-fit: cover;
  box-shadow: 0px 0px 6px 1px rgba(0, 0, 0, 0.5);
}

#author {
  font-size: 18px;
  font-weight: 600;
  text-transform: capitalize;
  margin-top: 10px;
  color:#FFFB7D
}

#job {
  text-transform: uppercase;
  line-height: 150%;
  margin-bottom: 10px;
  color: #85FFBD;
}

#info {
  height: 100px;
  font-size: 18px;
  color: #fff;
  font-weight: 400;
  text-align: center;
  margin-bottom: 30px;
}

.btn {
  text-decoration: none;
  border-style: none;
  font-size: 30px;
  margin: 0 10px;
  color: #85FFBD;
  cursor: pointer;
  background-color:#12192c;
}
.credit a{
  text-decoration: none;
  color: #000;
  font-weight: 800;
  }

  .credit {
    font-family: Verdana, Geneva, Tahoma, sans-serif;

    color:#000;
    text-align: center;
  }
const reviews = [
  {
    id: 1,
    name: "ram",
    job: "web developer",
    img:
      "https://cdn.pixabay.com/photo/2018/11/13/21/43/instagram-3814049__340.png",
    text:
      "Lorem ipsum dolor sit amet consectetur adipisicing elit. Debitis atque neque aut laudantium illo incidunt error aliquam eius minima amet. Ad beatae, culpa obcaecati quam cupiditate similique consequatur! Inventore, et."
  },
  {
    id: 2,
    name: "anees",
    job: "web designer",
    img:
      "https://cdn.pixabay.com/photo/2018/11/13/21/43/instagram-3814049__340.png",
    text:
      "Lorem ipsum dolor sit amet consectetur adipisicing elit. Debitis atque neque aut laudantium illo incidunt error aliquam eius minima amet. Ad beatae, culpa obcaecati quam cupiditate similique consequatur! Inventore, et."
  },
  {
    id: 3,
    name: "james",
    job: "intern",
    img:
      "https://cdn.pixabay.com/photo/2018/11/13/21/43/instagram-3814049__340.png",
    text:
      "SLorem ipsum dolor sit amet consectetur adipisicing elit. Debitis atque neque aut laudantium illo incidunt error aliquam eius minima amet. Ad beatae, culpa obcaecati quam cupiditate similique consequatur! Inventore, et."
  },
  {
    id: 4,
    name: "san",
    job: "the boss",
    img:
      "https://cdn.pixabay.com/photo/2018/11/13/21/43/instagram-3814049__340.png",
    text:
      "Lorem ipsum dolor sit amet consectetur adipisicing elit. Debitis atque neque aut laudantium illo incidunt error aliquam eius minima amet. Ad beatae, culpa obcaecati quam cupiditate similique consequatur! Inventore, et."
  }
];

const img = document.getElementById("person-img");
const author = document.getElementById("author");
const job = document.getElementById("job");
const info = document.getElementById("info");

const prevBtn = document.querySelector(".prev-btn");
const nextBtn = document.querySelector(".next-btn");

let currentItem = 0;

// load initial item
window.addEventListener("DOMContentLoaded", () => {
  const item = reviews[currentItem];
  img.src = item.img;
  author.textContent = item.name;
  job.textContent = item.job;
  info.textContent = item.text;
});

// show person based on item
function showPerson(person) {
  const item = reviews[person];
  img.src = item.img;
  author.textContent = item.name;
  job.textContent = item.job;
  info.textContent = item.text;
}

// show next person
nextBtn.addEventListener("click", () => {
  currentItem++;
  if (currentItem > reviews.length - 1) {
    currentItem = 0;
  }
  showPerson(currentItem);
});

// show prev person
prevBtn.addEventListener("click", () => {
  currentItem--;
  if (currentItem < 0) {
    currentItem = reviews.length - 1;
  }
  showPerson(currentItem);
});
Thank you for reading our blog. If you face any problem creating this Review Card Slider using HTML, CSS & JavaScript, then contact us or comment us. We'll try to provide a solution to your problem as soon as possible.


Post a Comment
Thank you
Learning robo team